 |
DarkMark
v1.11.11-1
Image markup for darknet machine learning.
|


|
|
DarkMark
v1.11.11-1
Image markup for darknet machine learning.
|
|
You first choose which project DarkMark needs to load. This is the DarkMark Launcher window:
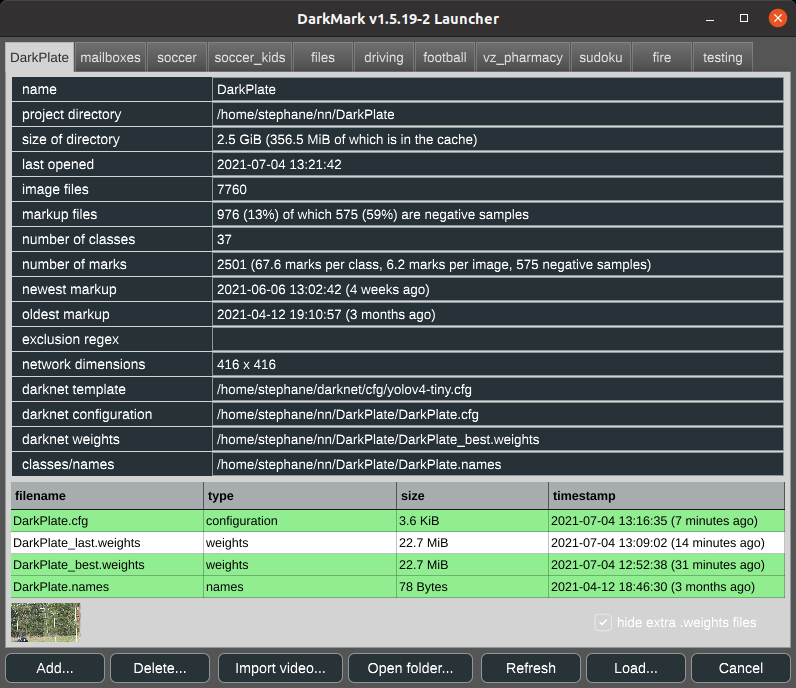
Projects are simple: each neural network "project" is a directory. These directories store the images, darknet configuration files, weight files, and the .txt files that darknet needs for labels. Tabs at the top represent each unique project ("directory") that DarkMark knows about.
Once you select a tab and click on "Load...", the launcher window is hidden and the DarkMark editor window is shown instead.
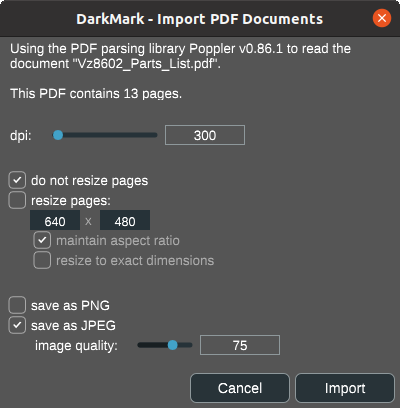
You can import PDF documents as images directly into your DarkMark project for annotating and training.
If you have video files instead of images, you can use the import tool to extract individual video frames as images and import them into your DarkMark project.
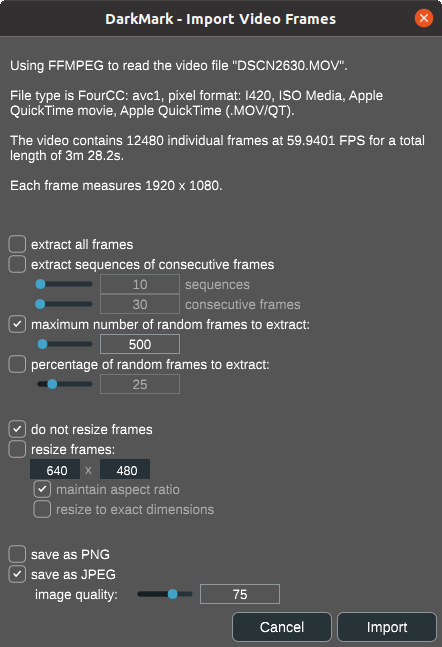
The options allow you to limit the number of imported frames, resize each frame as it is extracted, and select the output image format.
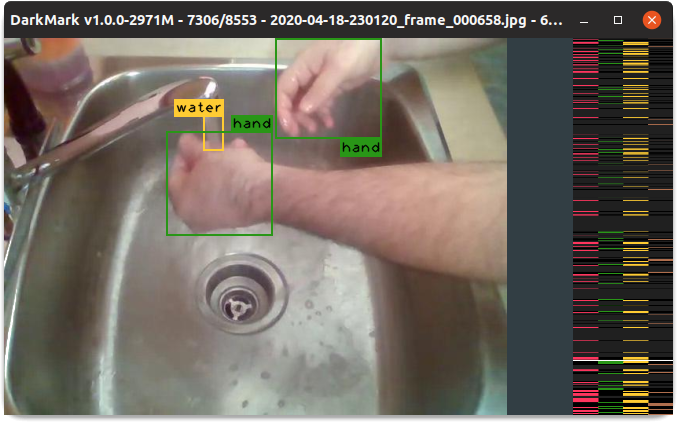
The editor is the main window for the DarkMark application. This is where you can browse through all the images located within that project and create, edit, or delete individual marks:
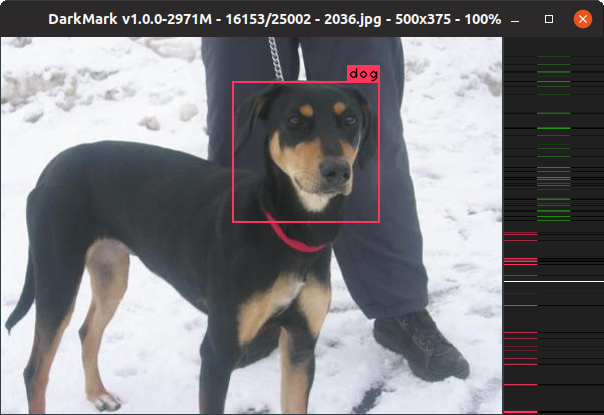
You click-and-drag the mouse to create or modify marks. Use the cursor keys, PGUP, PGDOWN, HOME, or END to change the image, the number keys to change the class of a mark, etc. See Keyboard Shortcuts for additional hints. Right-mouse-click in the editor window will provide many other options.
When you quit from the DarkMark Editor window, it will bring you back to the DarkMark Launcher window.
Right-mouse-click in the DarkMark Editor window to create all of the required Darknet files:
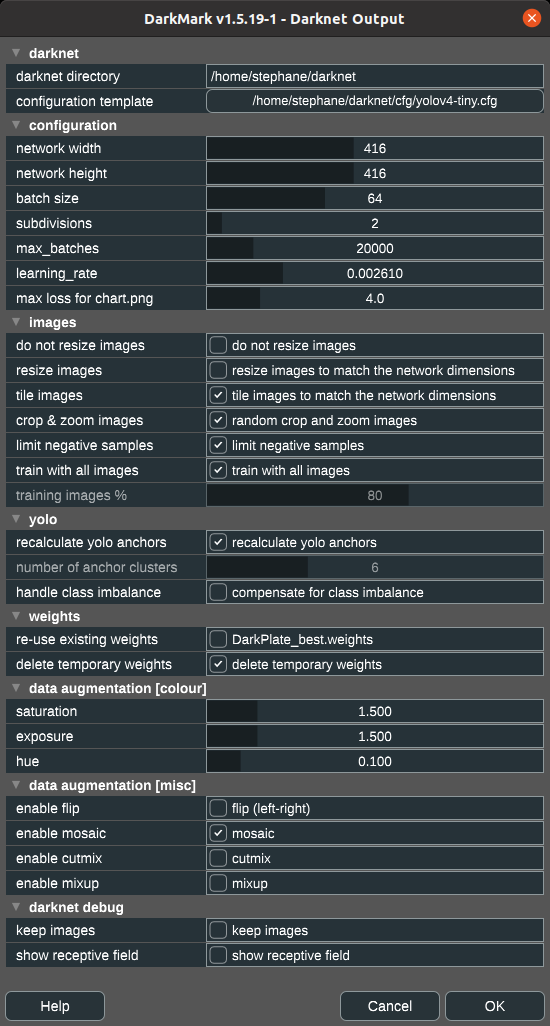
This will create the following required text files which Darknet uses when training a new artificial neural network:
| filename | description |
|---|---|
project_name.cfg | YOLOv3 configuration file |
project_name.data | references the other files |
project_name_train.txt | list of images to use for training |
project_name_valid.txt | list of images to use for validation |
project_name_train.sh | bash script to start the darknet training |
send_files_to_gpu_rig.sh | use rsync to copy all of the source files to the GPU rig |
get_results_from_gpu_rig.sh | use rsync to copy the results back from the GPU rig |
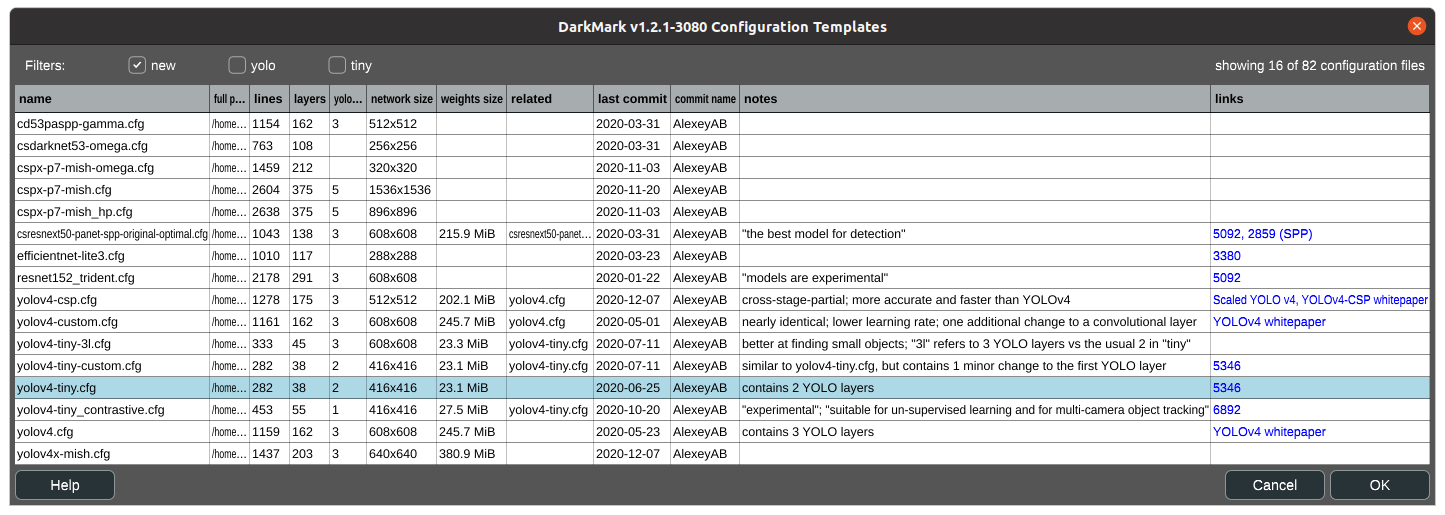
Choose which ".cfg" file DarkMark should use as a template to build the Darknet configuration.
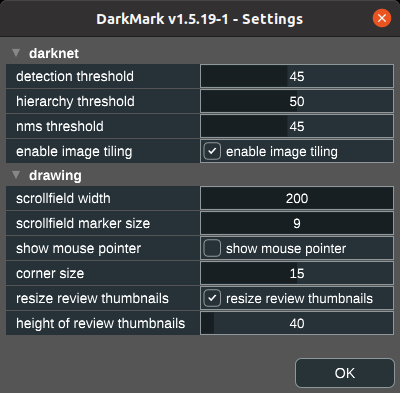
Press "e" (see Keyboard Shortcuts) to modify several settings:
0 to hide the scrolling field.Right-mouse-click in the DarkMark Editor window to easily review all the image markup:
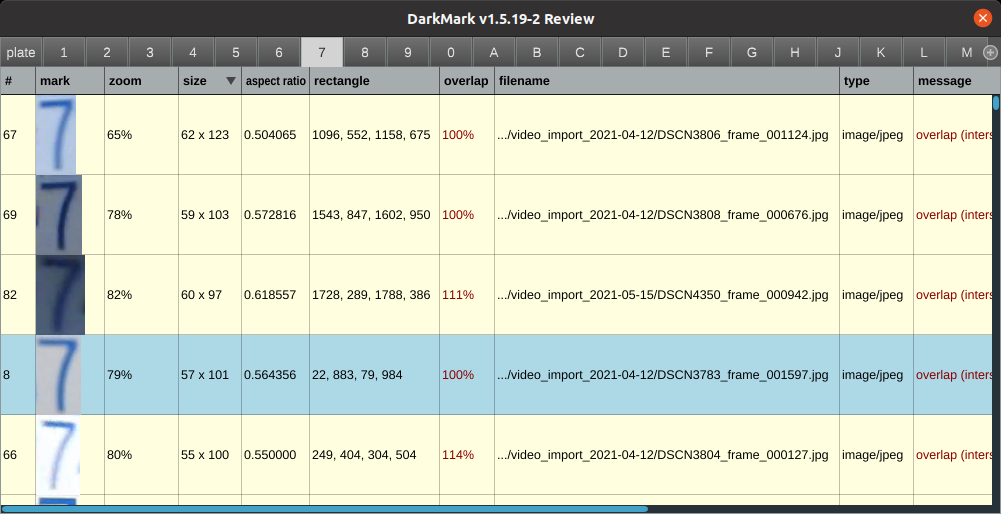
This will help ensure your network is trained correctly. Quickly scroll through all of the similar images from the same class to ensure a mark hasn't been labelled incorrectly. Double-click on that row to immediately open that image in the DarkMark Editor window.
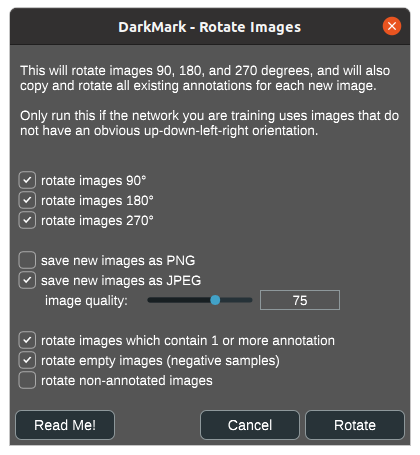
Easily rotate both images and annotations 90°, 180°, and 270°.
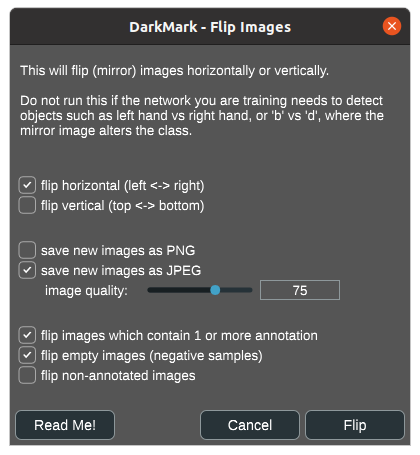
Easily flip images horizontally or vertically.
Right-mouse-click in the DarkMark Editor window to view statistics on all the marks:
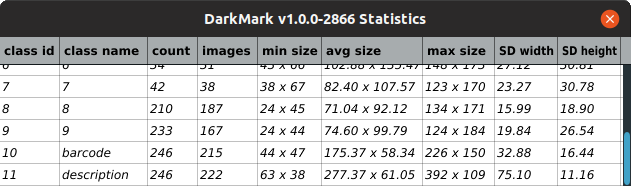
This can help identify which classes need better representation, or if any marks have been incorrectly set on unusually small or unusually large images. Double-click on the "min size" or "max size" cell to immediately open that image in the DarkMark Editor window.
The scroll field on the right side of the main window shows which images have been marked up. You can click, drag, or use the mouse wheel to move to a different image.
Use DarkMark Settings to hide the scrollfield (set the width to 0px) or set an explicit width.
The jump window is used to quickly switch between images. When the images are sorted alphabetically and broken up into different sets (different subdirectories), the jump window will draw a vertical line between each set:

In this example, there are 6 different image data sets in the project, represented by the 6 sections along the horizontal axis:
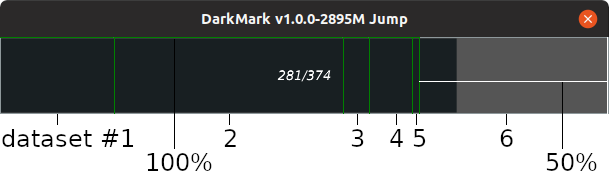
The images from the first five data sets have all been marked and are shown with a green outline. The last data set is incomplete, with approximately 50% of the images having been marked, which is why a horizontal line is shown partway through the set.
This video briefly shows how to use DarkMark:
 1.8.17